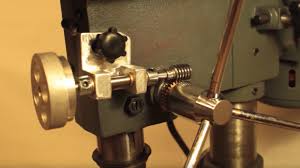
Converting a drill press into a mill opens up a world of possibilities for the DIY enthusiast or hobbyist. While a drill press is primarily designed for drilling holes, with some modifications and additional components, it can be transformed into a functional milling machine. This conversion allows for precision milling operations, making it ideal for tasks such as cutting, shaping, and slotting various materials. In this comprehensive guide, we will walk you through the step-by-step process of converting your drill press into a mill, highlighting the necessary tools, safety considerations, practical applications, and maintenance tips. Lets understand more about drill press mill conversion.
Understanding the Drill Press Mill Conversion:
Before delving into the conversion process, it’s essential to grasp the basic components of a drill press. A typical drill press consists of a motor, a column, a quill, a chuck, and a worktable. To convert it into a mill, you’ll need additional components such as a milling head or spindle, a milling table or cross-slide, and various accessories.
Required Tools and Materials:
To embark on this conversion journey, gather the following tools and materials:
- Drill press
- Milling head or spindle
- Milling table or cross-slide
- Wrenches and screwdrivers
- Clamps and vise
- Safety goggles, gloves, and ear protection
- Cutting fluid
- Measuring tools (calipers, ruler, etc.)
Step-by-Step Conversion Process:
- Disassembling and Preparing the Drill Press: Start by removing the chuck and drill press table. Carefully loosen the chuck using a wrench and unscrew it from the spindle. Next, detach the drill press table by unscrewing the clamps or bolts securing it to the column. Clean the disassembled components and inspect them for any signs of wear or damage.
- Installing the Milling Components: Mount the milling head or spindle onto the drill press column. Ensure it is securely attached and aligned with the quill. Next, affix the milling table or cross-slide to the drill press’s base or worktable. Adjust the table’s position and alignment to achieve optimal milling precision. Double-check all the connections and tighten the necessary bolts or clamps.
- Modifying the Drill Press for Improved Milling Capabilities: To enhance the functionality of your converted drill press mill, consider implementing the following modifications:
- Adding a Digital Readout (DRO) or Linear Scale: Install a DRO or linear scale system to accurately measure the movement of the milling components. This provides precise control and repeatability in your milling operations.
- Enhancing Rigidity and Stability: Reinforce the drill press structure by using additional supports or braces. This helps reduce vibration and ensures stability during milling, leading to better results.
- Installing a Vise or Clamping System: Attach a vise or clamping system to secure your workpiece firmly in place. This prevents movement or shifting during milling, guaranteeing accurate and consistent cuts.
Safety Considerations:
Safety should always be a top priority during the conversion process and when operating a converted drill press mill. Adhere to the following safety guidelines:
- Wear appropriate personal protective equipment (PPE), including safety goggles, gloves, and ear protection.
- Securely fasten the workpiece using clamps or a vise to prevent it from moving during milling.
- Avoid loose clothing, jewelry, or long hair that may get caught in the machinery.
- Always use cutting fluid to lubricate the milling process and reduce heat buildup.
- Familiarize yourself with the specific safety instructions and warnings provided by the manufacturer of your drill press and milling components.
How to Connect an Android Phone to a Roku TV?
Practical Applications and Limitations:
Once you’ve successfully converted your drill press into a mill, you can explore various practical applications, including:
- Milling slots, keyways, or grooves in metal or wooden workpieces
- Creating custom shapes or profiles in materials such as aluminum, brass, or plastic
- Making precision cuts for model-making, prototyping, or small-scale production
It’s important to note that converted drill press mills have limitations compared to dedicated milling machines. The reduced rigidity and lower horsepower of a drill press may limit the size, depth, or material hardness suitable for milling. Consider these factors when selecting projects and setting expectations.
Maintenance and Troubleshooting:
To ensure the longevity and optimal performance of your converted drill press mill, follow these maintenance tips:
- Regularly clean and lubricate the milling components to prevent buildup of debris or rust.
- Check and tighten all bolts, screws, and clamps to maintain stability.
- Periodically inspect and replace any worn-out or damaged parts.
- Troubleshoot common issues such as excessive vibration, inaccurate measurements, or spindle runout by referring to the drill press and milling component manuals or seeking expert advice.
Conclusion:
Converting a drill press into a mill expands its capabilities and allows you to embark on a wide range of milling projects. By following the step-by-step process outlined in this comprehensive guide and considering the safety precautions, you can transform your drill press into a versatile milling machine. Remember to explore the potential applications, be mindful of the limitations, and prioritize regular maintenance to ensure the longevity of your converted drill press mill. With proper care and practice, you’ll be well on your way to creating precision-machined parts and enjoying the satisfaction of DIY milling projects.


